
The onboarding wizard opens automatically on your first admin page load after you activate Gratora. It walks you through four steps to configure your fundraising setup.
Every step shows a “Step X of 4” counter. Until the last step, you can leave the wizard with the Skip for now link at the top of the screen.
Step 1: Who’s fundraising?
Pick who is fundraising. You have four options:
- Nonprofit or charity
- Community or faith group
- Individual fundraiser
- Just exploring
Pick one before you continue. Get started takes you to the next step.
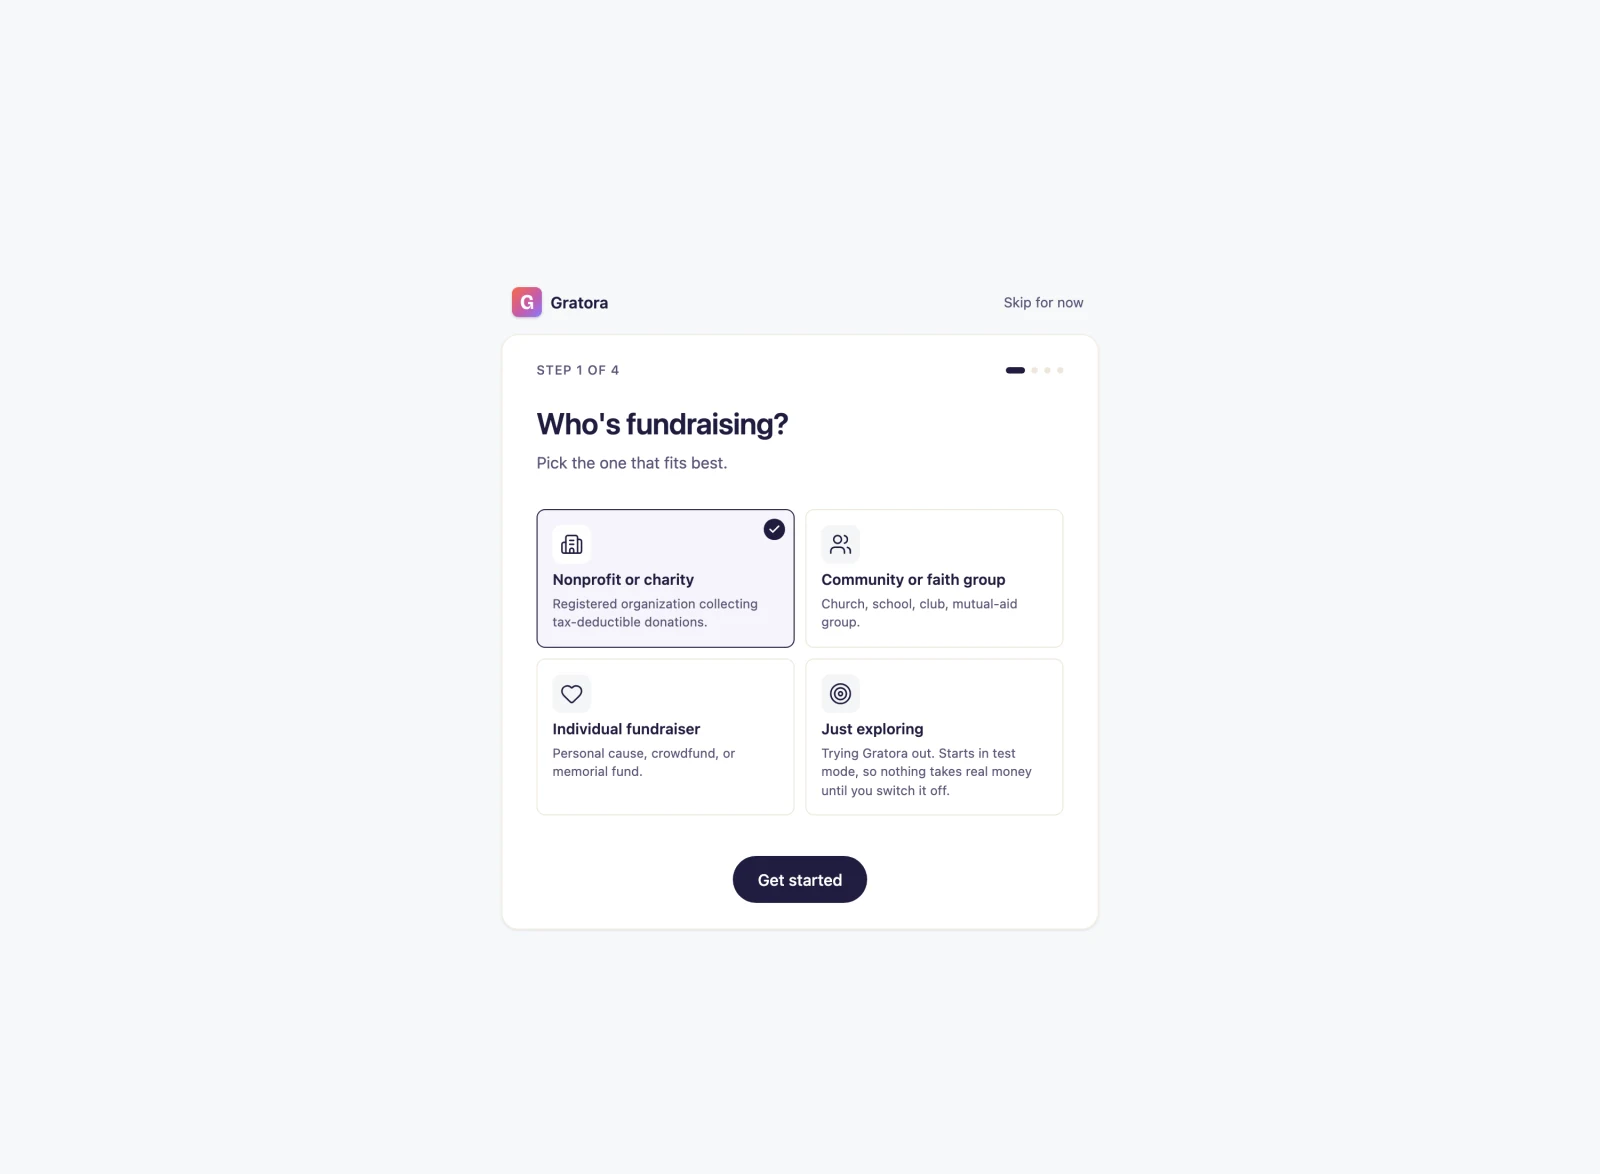
What “Just exploring” does
Selecting Just exploring turns on org-wide test mode when you finish the wizard. In test mode, no real payments are processed and a sandbox gateway becomes available, so you can try out every feature without risk.
You can turn off test mode later in Fundraising > Settings > Payment gateways when you are ready to accept real donations.
Step 2: Where are you based?
Enter your organization name and contact email, then pick your country. If you pick the United States, Canada, or Australia, a second dropdown appears for the state or province, and you have to fill it in before you continue. If you chose Individual fundraiser on the previous step, the first section asks for your own name instead.
The last section on this step is Currency. Gratora fills it in from the country you picked where it recognizes one, and you can change it to any supported currency. This is your organization’s default currency, which all reporting rolls up to.
The postal address is not asked for here. It is optional, and you can add it later under Fundraising > Settings > Organization, where receipts read it from.
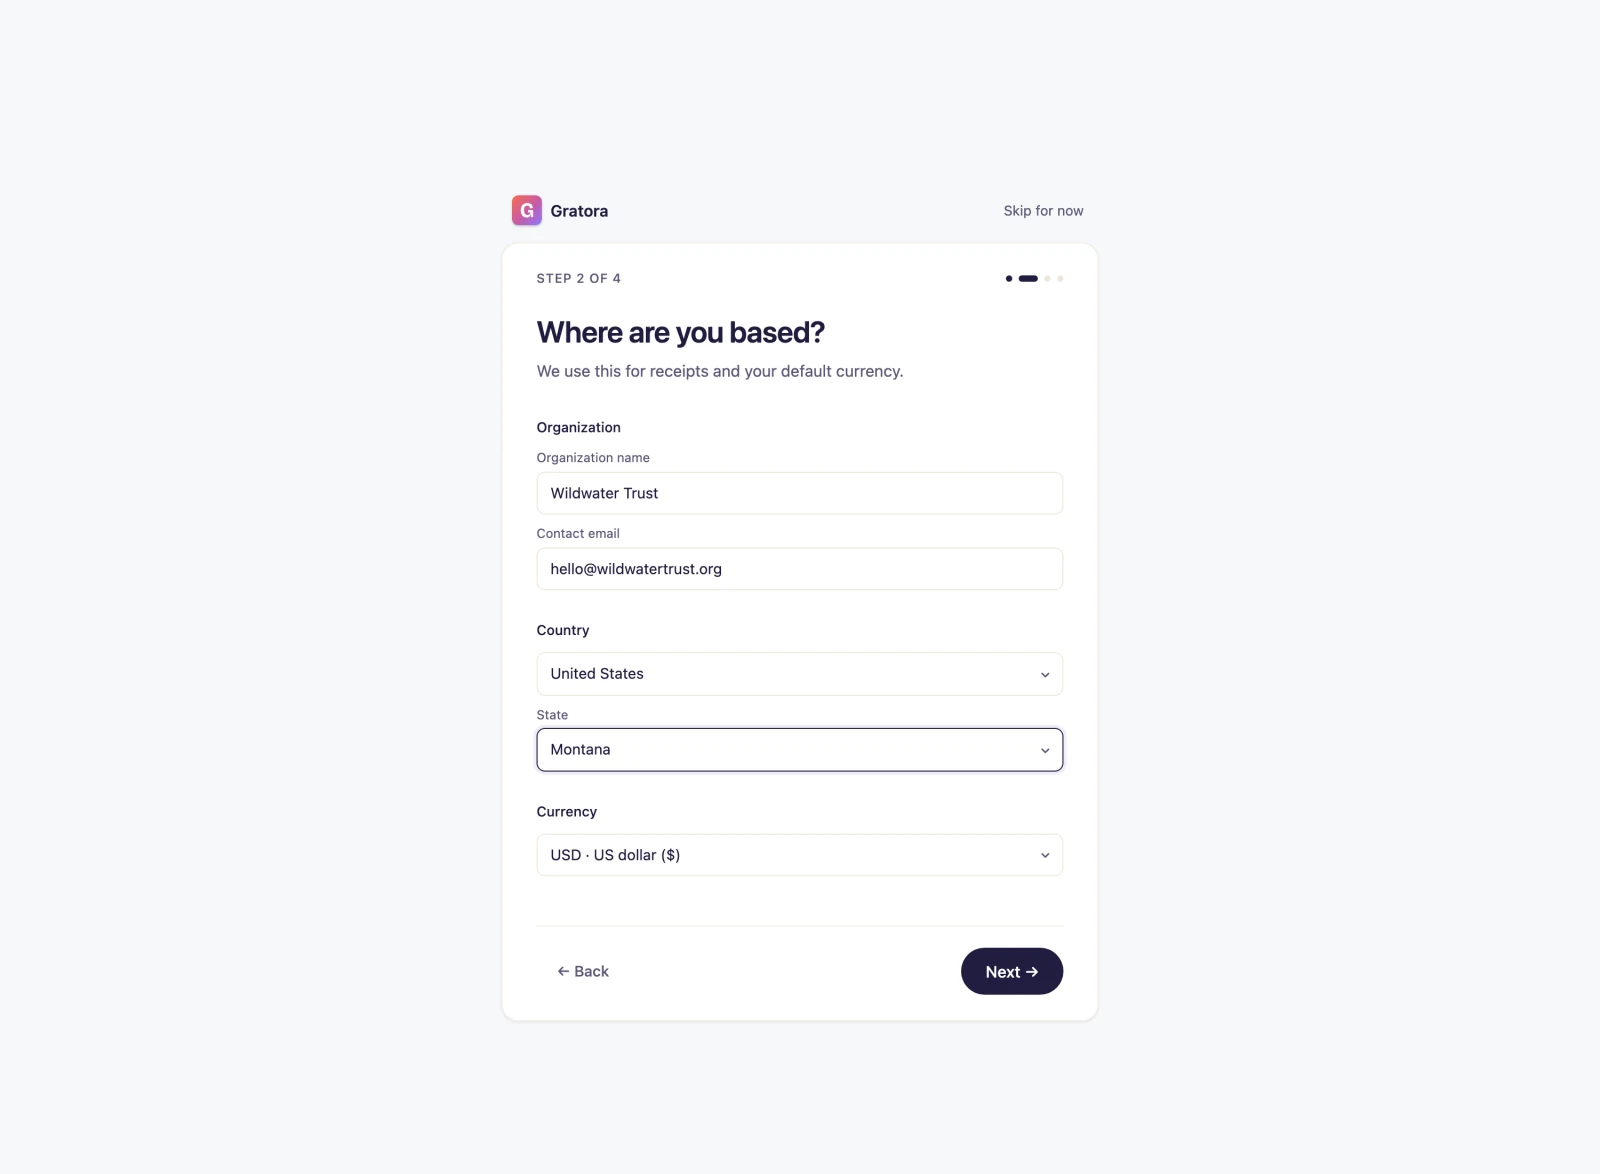
Your organization name appears on donation receipts.
Step 3: Pick a starting look
Choose one of four brand presets for your donation forms:
- Classic: friendly and rounded, the Gratora default.
- Bold: deep navy, strong type, dramatic shadow.
- Quiet: minimal lines, lots of white space.
- Use my theme: inherits styles from your site theme. This option is unavailable when Gratora cannot detect a theme palette.
A live preview of a sample donation form sits below the presets and updates as you switch between them. You can edit colors and typography at any time afterwards in Fundraising > Settings > Brand.
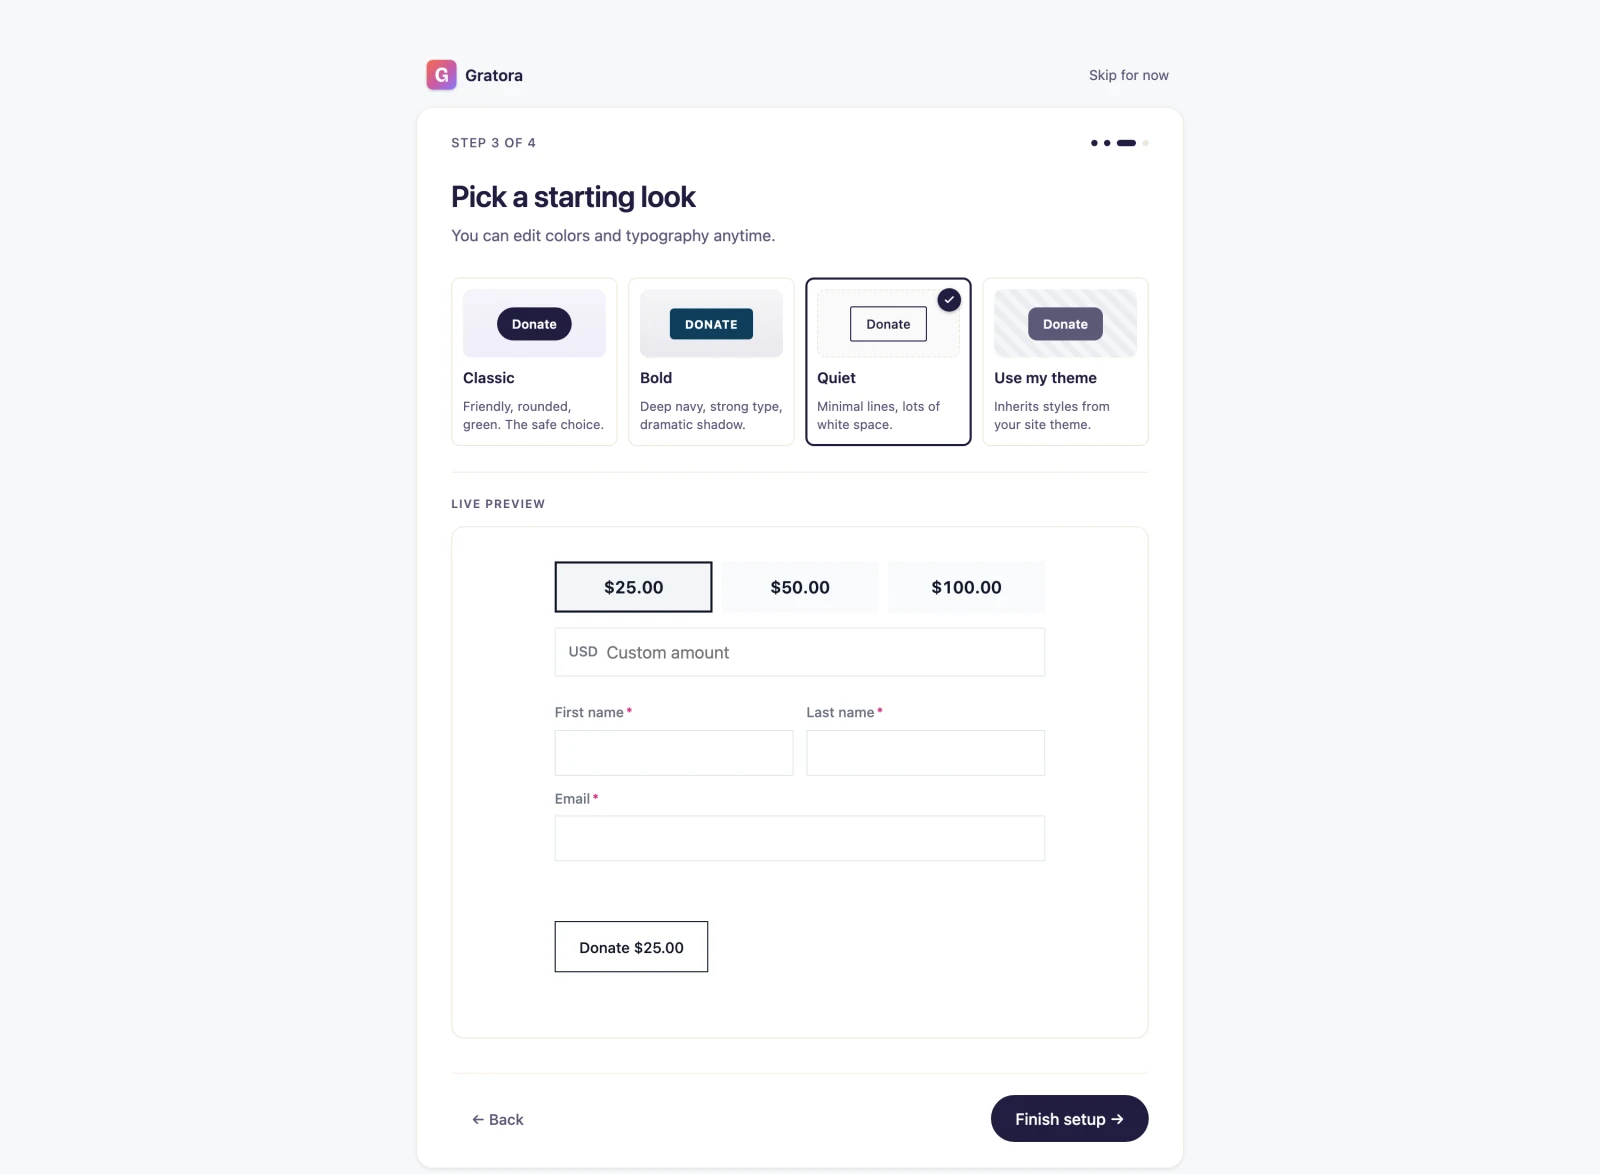
Click Finish setup to save your choices. Your preset becomes the organization default, which every campaign and form starts from.
Step 4: You’re set up
The final step is a short get-started checklist with two links:
- Connect a payment gateway, which opens the payment settings.
- Create your first campaign, which opens the campaigns screen with the new-campaign drawer already open.
There is also a Skip for now link to your dashboard. Nothing redirects you automatically, so you choose where to go next.
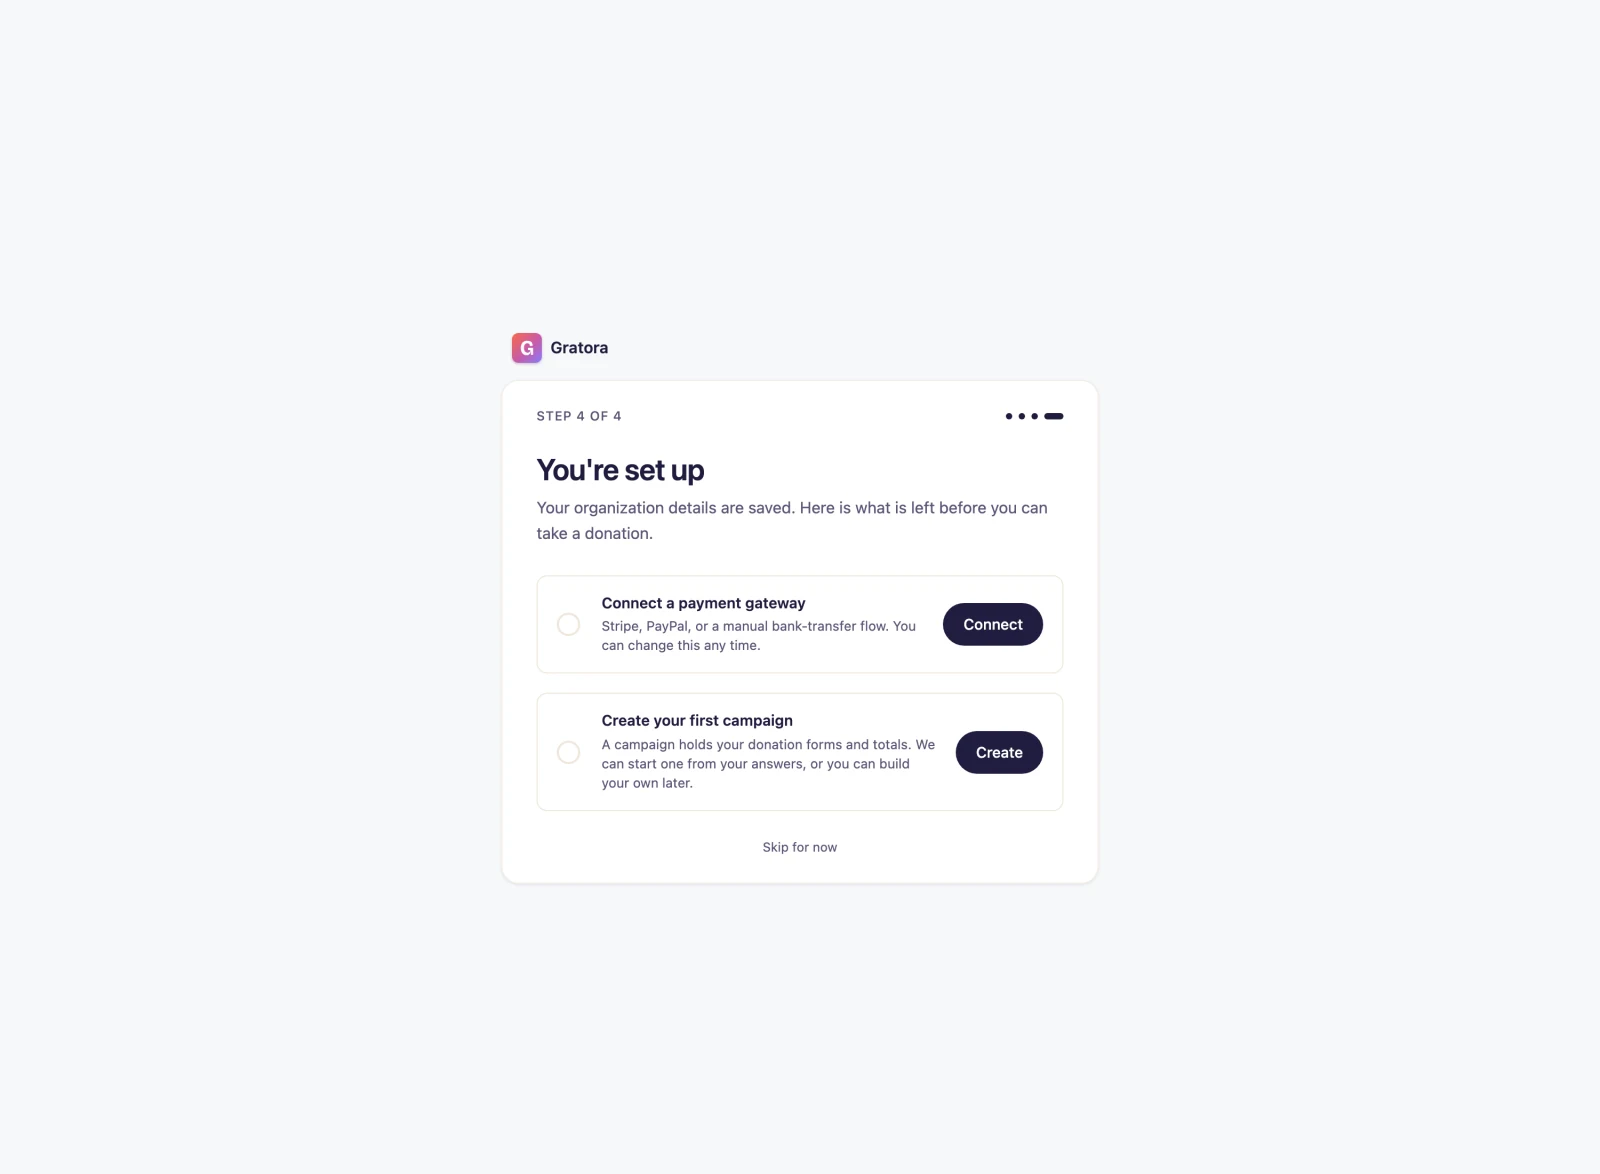
Next steps
- Learn about the dashboard to monitor your fundraising progress.
- Read Create your first campaign to understand campaigns in detail.
- Connect a payment gateway in Fundraising > Settings > Payment gateways to start accepting real donations.