
The Donor CRM add-on lets your team add its own information to the donors Gratora records, find donors by it and follow up with them. It is part of the Advanced and Elite plans. On the Plugins screen it is listed as Gratora Donor CRM.
It runs on Gratora 1.1.0 or later, and a few parts need 1.2.2. It sends no email to donors: its emails go to your team.
What it adds
- Tags, labels you name yourself, to mark donors.
- Custom fields of five types: text, number, date, dropdown and checkbox.
- Segments, saved rules that select donors, with a live count and a CSV export.
- Tasks, follow-ups on a donor with a due day and an owner.
- Automation rules: when something happens, do something for the donor.
- Scheduled reports, a weekly or monthly email of figures for your team.
- Push to Connect, which tags a segment’s donors at Mailchimp, Kit or ActiveCampaign.
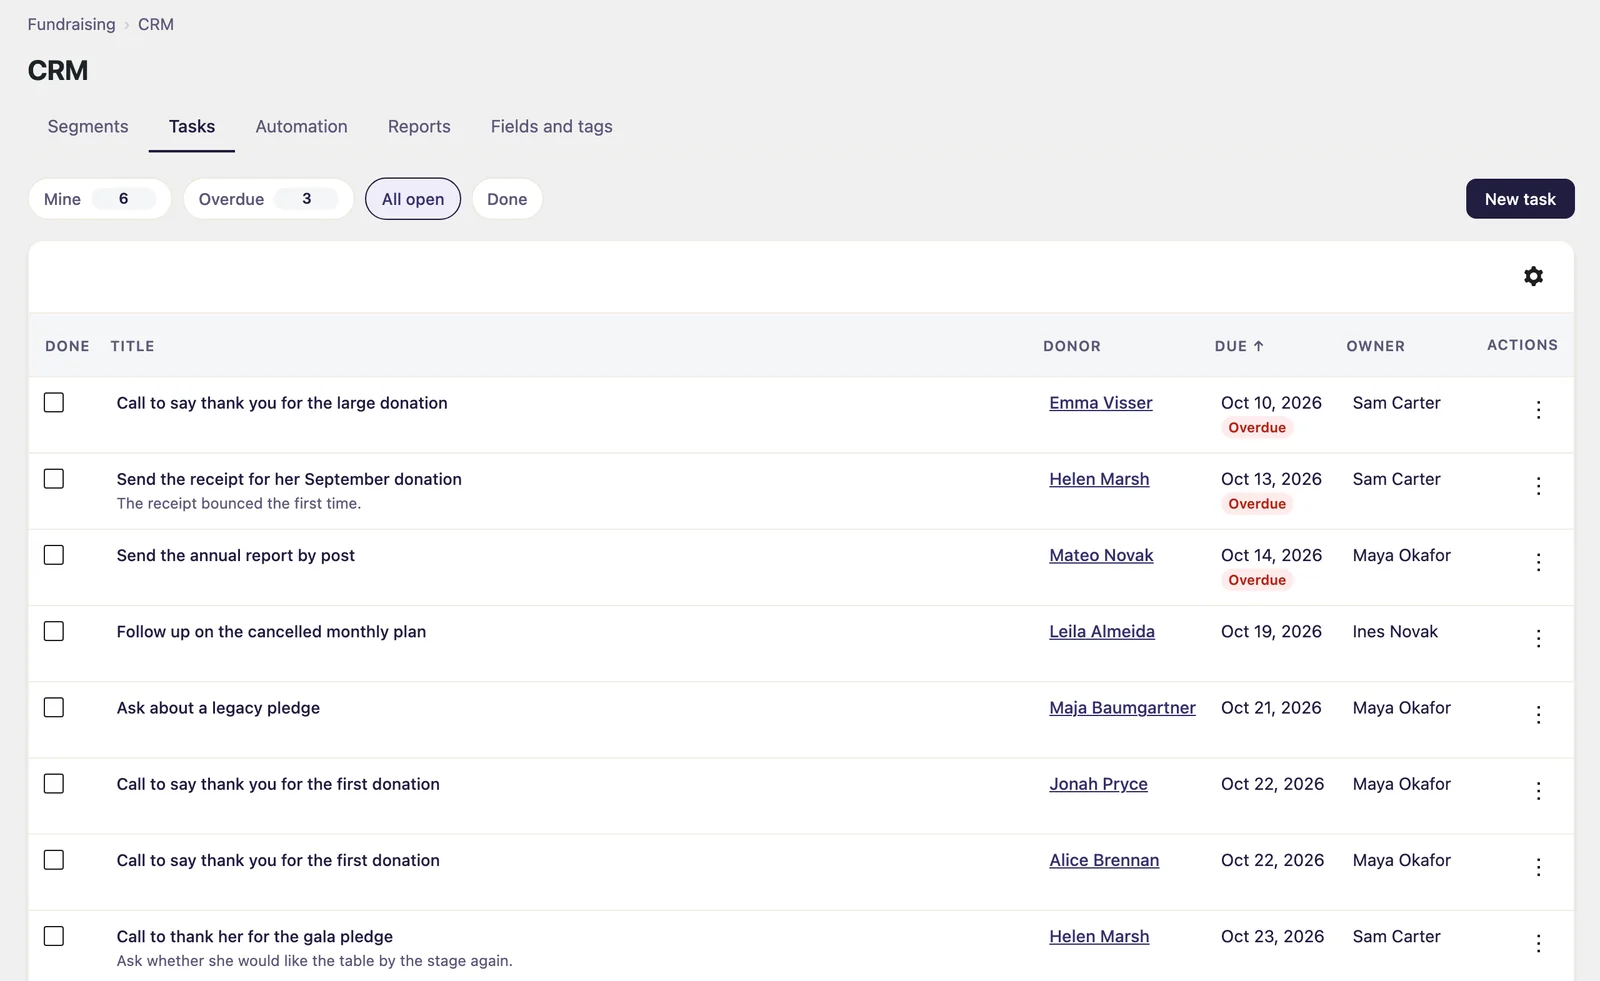
Where it lives
- Fundraising > CRM, with five tabs: Segments, Tasks, Automation, Reports and Fields and tags.
- A CRM card on each donor’s profile, with the donor’s tasks, tags and fields. Once a rule has done something for the donor, an Automation card under it says what.
- Its emails, Task assigned, Automation notice and Donor CRM report, under Fundraising > Settings > Emails. With Gratora 1.2.2 or later they are listed under Staff emails.
Who can use it
The add-on has one permission of its own, Use the donor CRM, listed under Donor CRM in Fundraising > Settings > Roles. Administrators have it. Most of the add-on also needs Gratora’s View donors.
| Permissions | What the person can do |
|---|---|
| Use the donor CRM | Only the Fields and tags tab: make, rename, merge and delete tags and fields. No donor’s tags or field values. |
| Use the donor CRM and View donors | Everything else: the CRM card, segments, tasks, automation rules and scheduled reports. |
Exporting a segment also needs Export donor list (CSV), a rule about funds needs View donations, and pushing a segment needs Connect’s Manage integrations. See Roles and permissions.
Tags and fields
- Go to Fundraising > CRM and open Fields and tags.
- Click Add tag, enter a Name, choose a Colour and click Add tag.
- Click Add field, enter a Label, choose a Type and click Add field. A dropdown also takes its Choices, one per line.
- Open a donor under Fundraising > Donors. In the CRM card, choose a tag under Add a tag and click Add. The × on a tag takes it off.
- Fill in the fields and click Save.
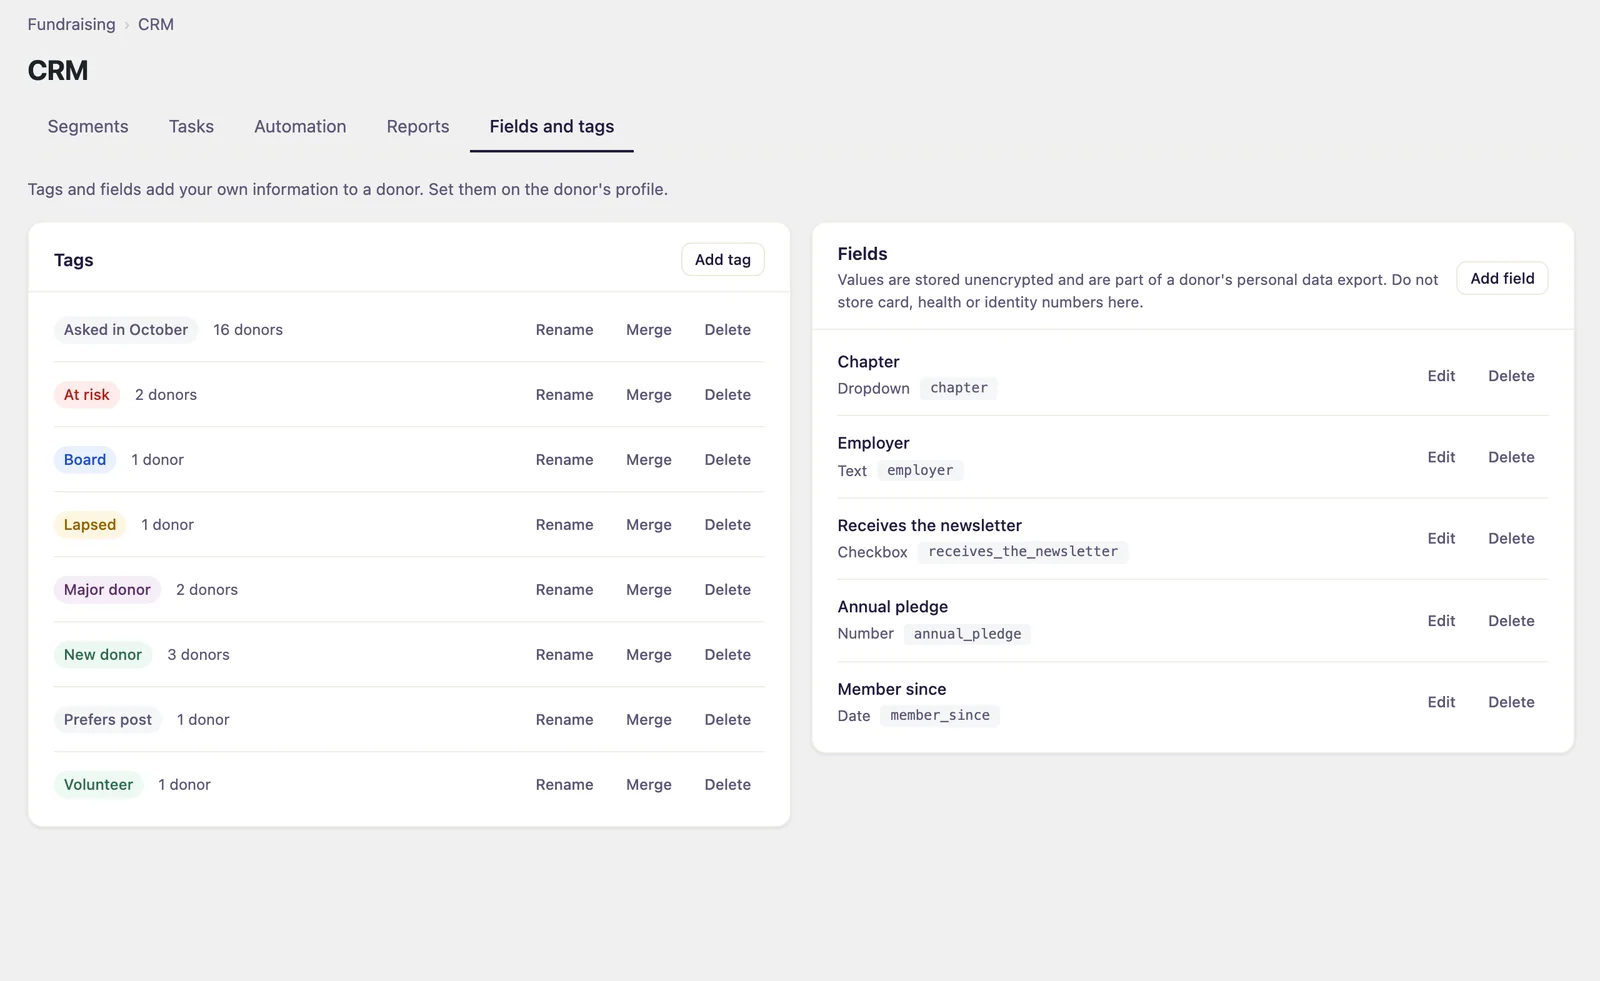
A field’s type and key cannot be changed later. Merge moves a tag’s donors to another tag, and its segments and rules follow. Before a tag or field is deleted, the dialog says how many segments and rules use it: they stop working until you edit them.
Field values are stored unencrypted, so never keep card, health or identity numbers in one. They are part of the donor’s personal data export, and with Gratora 1.2.2 or later of Gratora’s own donor export, under Custom fields. Tags are in neither. Erasing a donor removes both.
Fill a field from a donation form
- On Fields and tags, click Edit next to the field.
- Under Form field, choose a field of one of your donation forms. Only form fields whose answers fit the field’s type are listed.
- Click Save.
When a donation made through that form is paid, the donor’s answer is copied into the field. The newest answer wins, an empty answer never clears a value, and test donations fill nothing.